IT equipment is very expensive. When it comes to servers, prices can reach several thousand dollars. Thus, when buying network hardware, users treat it carefully and fasten reliable to prevent accidental falling and damage.
The installation of a server rack requires preparatory steps, caution during fastening, and ensuring safe storage after mounting. Thus, the server mounting procedure consists of three steps. Let’s consider each stage of how to mount server in rack in more detail.
Tips before Installation
Do not neglect the preparatory process. Skipping this stage will lead to possible problems during mounting, slow down the process, or be potentially harmful to telecommunications equipment. Pay due attention to the below-mentioned criteria:
Check Server and rack Compatibility
Server cabinets have standardized dimensions to accommodate most IT hardware. However, sometimes producers have unique furniture. So, the first thing to do is to make sure that your equipment fits your cabinet. Here, follow the sequence of steps:
- measure rack dimensions or find them in a user manual;
- measure your server;
- conclude whether the equipment fits the rack.
Here, remember to leave some extra space for air circulation and hardware cooling and cable routing. Thus, do not chase tight fitting in a 4-post server rack.
Find an Adapter
If you found out that your hardware and furniture are incompatible during a previous step, search for an adapter that will help achieve perfect fitting.
Check Rack Holes
You definitely know that server racks have specialized holes and slots, which are used for fastening active network equipment, accessories, shelves, and rails, as well as fan mounting. Make sure that the provided holes fit your hardware and are suitable for your system.
Adjust Holders to Fit Depth
Mounting rails and shelves are used to accommodate servers, switches, routers, and other accessories. Make sure that they are placed at the required height and depth to carry devices durably and reliably.
Each of these stages is aimed at preventing fatal mistakes. If you identified some trouble or incompatibility, eliminate problems first, and then go on. Once you’re done with these steps, you’re ready for mounting.
Crucial Steps for Durable Server Fastening
Now, let’s see how to mount a server in furniture correctly. Study all stages properly and then proceed to fasten devices.
Disassemble Mounting Rails
Holes on vertical posts are used for mounting hardware. There are many holes places at a distance. Usually, 3 holes take 1 unit. Take off the rails by sliding them outside the rack.
Attach Counterparts to the Server
Apply screwdrivers to lose bolts and adjust the height of the rails. First, take screws and insert them into mounting holes of cabinet posts. Attach assemblies. Tighten the screws and check whether it is fastened reliably.
Attach Rails to Cabinet Posts
Here, two accessories come in handy. Technicians choose either mounting brackets or chassis brackets. Mounting brackets are found on the front side of the chassis. Chassis are fastened to cabinet bodies with cage nuts to guarantee secure carrying and prevent hardware skewing.
Mount the Device
- Rails are completely extended. Fixing occurs in this state.
- Equipment counterparts are aligned with cabinet rails.
- The device is slightly pushed inside. Yet, do not apply force. Check hardware for sliding and tipping. Make sure stable anchoring.
- Mounting brackets are applied to secure hardware.
By following this guide, you’ll keep in mind how to rack a server and cope with the task with flying colors.
Warnings and Cautions
Make sure to take into account the following caution measures at the stage of planning server cabinet layout:
- Heavy equipment (servers, in particular) is accommodated at the bottom. Always follow the simple rule of placing heavy devices closer to the ground. If you neglect this rule and put a heavy serve on top, an entire cabinet can tip over, causing lots of money loss and damage.
- Guarantee sufficient airflow. When performing computing tasks, servers consume a lot of power and emit a lot of heat in return. Thus, proper air circulation is an obligatory requirement for a “healthy organism” functioning. Consider fan installation or use natural airflow to cool down devices. Appropriate cooling strategies are chosen, depending on the rack type (closed vs open frameworks).
- Temperature control is inevitably connected with a previous point since the airflow is designed to exchange heat. Thus, optimal climate management is crucial for an internal environment. For example, blanking panels are applied to plug unused slots and close the air circuit. Fans are mounted to force the air to circulate in a particular direction.
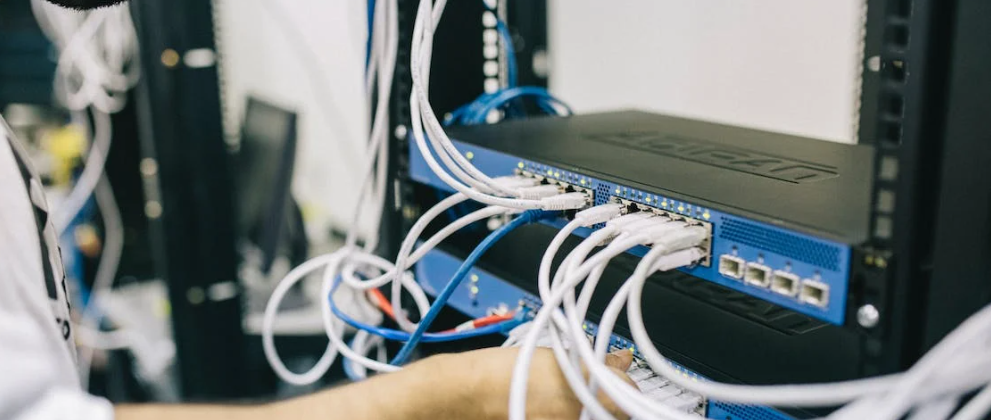
- Cable wiring. Another important issue is leaving free space. Extra space is designed for two purposes: air circulation and cable routing. Make sure to leave space to connect devices to PDUs, mount switches, and provide other connections for communication between system units.
Hardware mounting in server furniture is an important task. The correctness of fastening influences the reliability of accommodation. Improper installation may lead to damage and losses. The mounting process implies many cautions and steps. If you study this information attentively, you can easily install the server yourself in your home.
But note that before you install equipment, you should pick a proper model. This task is even more important. It means that the preparatory phase requires particular attention and greatly affects the future success and smoothness of system performance.